How To Use A Green Screen In CapCut?
Unlocking the power of green screen effects in CapCut has become a fundamental skill for those seeking to enhance their videos with captivating visuals and immersive backgrounds. Whether you’re aiming to create a viral meme or craft eye-catching banners, CapCut provides a user-friendly platform that seamlessly integrates green screen technology into your projects. In this comprehensive guide, we will walk you through utilizing the green screen feature in CapCut, enabling you to elevate your content and captivate your audience effortlessly. So, let’s delve into the world of green screen editing with CapCut and discover its endless possibilities for creating stunning visuals.
What is Green Screen on CapCut?
CapCut is an amazing video editing software that provides two distinct methods for utilizing green screen technology, It is the built-in chrome key that functionally allows users to selectively eliminate any color, like green and black color from their footage.
How to Remove Green Screen on CapCut?
Commonly, the Green screen is used in two major ways in CapCut APK. CapCut contains its algorithm-powered background removal tool that allows users to remove the green screen. Secondly, it also has a “Chroma key” option which kicks out any color you wish. Follow any of the given below method that best fits your specific needs. Ensure you have your background footage and the green screen footage saved to your files. The reason why you want background footage is that once we remove the green screen, it will have a transparent background, so you need something as the background for your green screen.
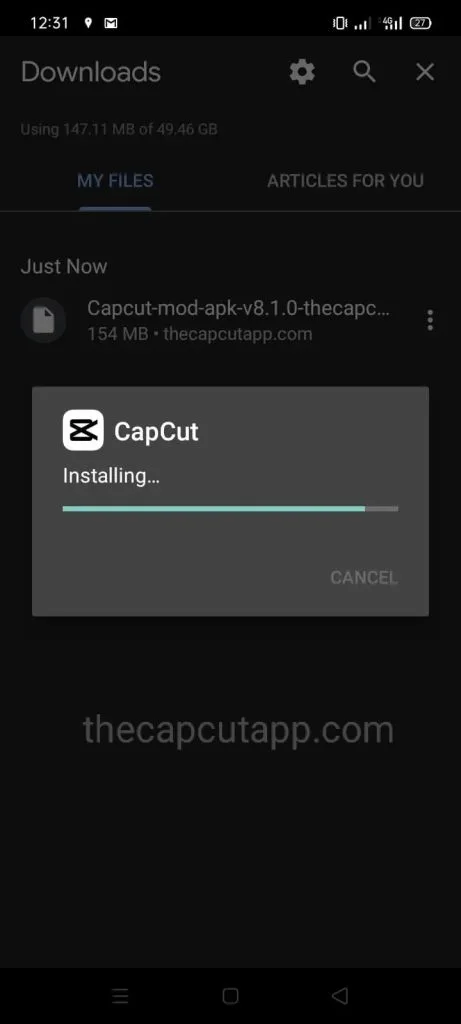
Step 1: Download the latest version of the CapCut application and Install CapCut on your mobile.
First, you must Install the latest version of CapCut APK on your mobile phone.
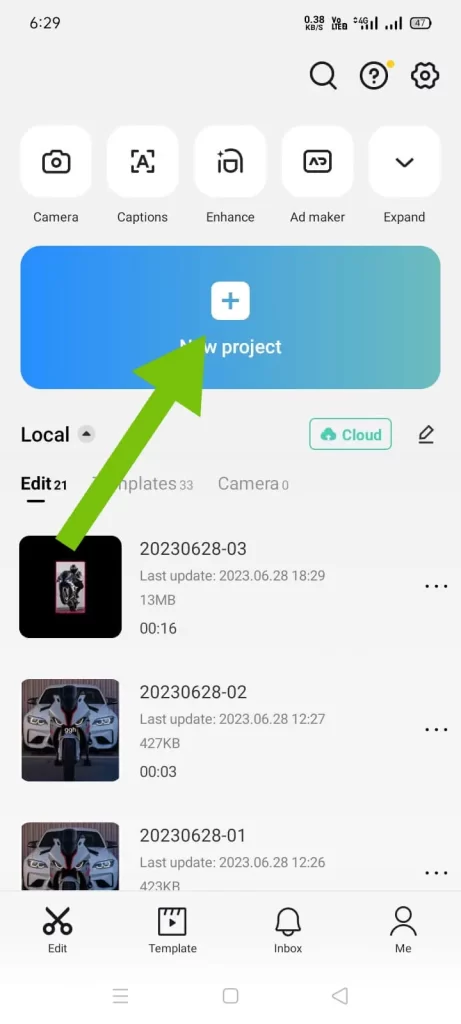
Step 2: Open the App and Start a New Project.
To get started, open up the CapCut app, and then go over to your existing CapCut project or create a new one. I’m just going to create a new project.

Step 3: Import the image or video you want as a background.
After clicking the new project, it’ll lead you to the gallery to choose the photo or video which will act as a new background. In the given image, I’ve chosen the white image.

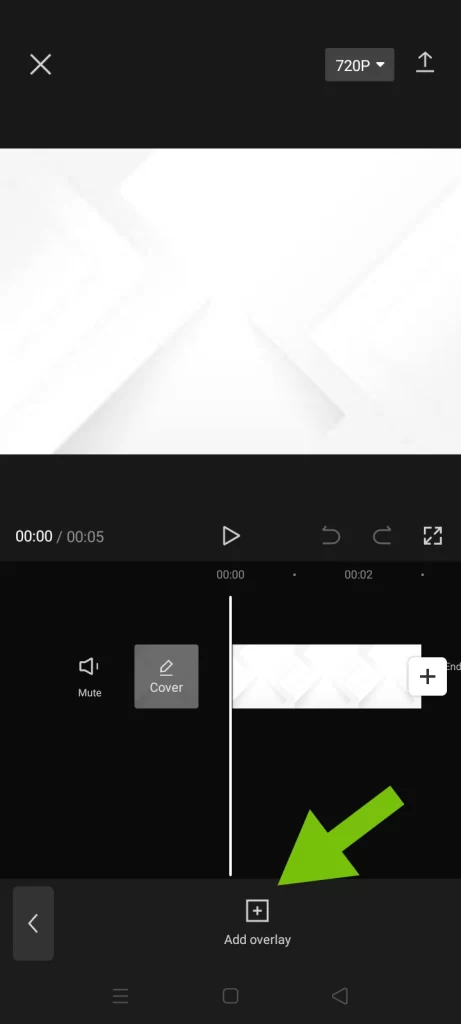
Step 4: Tap on the “Overlay” button and then click on “Add Overlay”.
When you’ve chosen the photo or video, click on “Overlay” and then “ Add Overlay” which will be available in the center of the bottom toolbar.

Step 5: Add a photo or video having Green Screen.
After clicking the “Add overlay” option, again the gallery of your device will be open. Now, select the video having a green screen.

Step 6: Adjust the Position and Size using two fingers.
Once you import that file, you can adjust its size to fit the scene. Just with your two fingers, you can zoom in on the video.

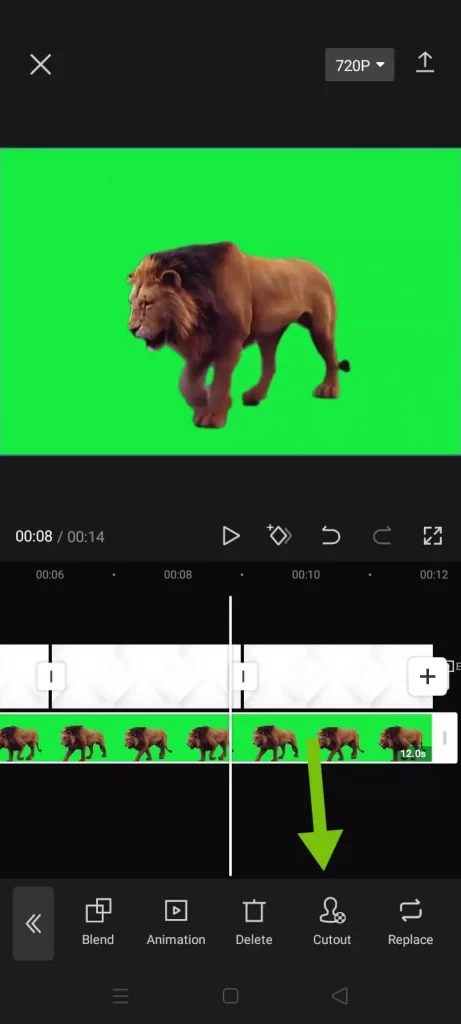
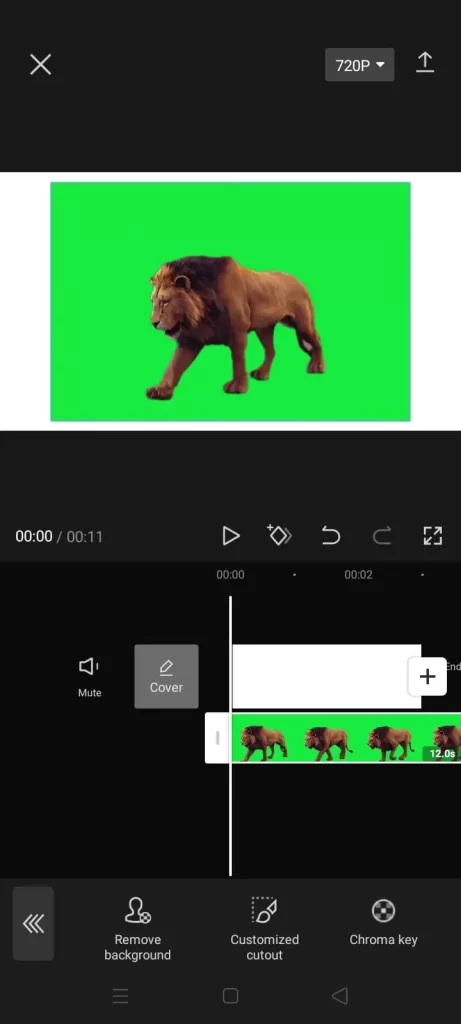
Step 7: Click the “Cutout” option given at the bottom.
Swipe through the toolbar at the bottom until you see an option called Cutout. Once you find it, simply tap on it. And now you’ll see three different options.

Step 8: Select the “Chroma Key” option.
Since we are working with a green screen, just tap the “Chroma key” and a circle will appear on the screen.
Step 9: Bring the circle on the color you want to remove.
And then, select the color that you want to remove by just swiping the circle. In this case, it’s green.

Step 10: Adjust the Intensity and Shadow
Once you select the green color, tap on Intensity. And then adjust this slider. You’ll see that the green background will disappear as you increase it. And if you have color leaks around your video, tap on Shadow. And play around with the slider until it’s fixed. So now, if I play this, you can see it has no green.

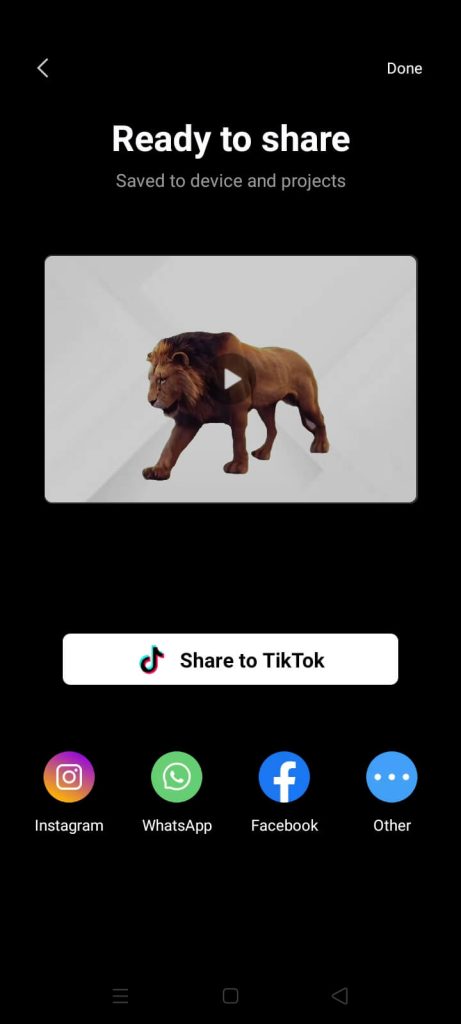
Step 11: Click on the “Export” button.
So now all you have to do next is tap on the Export button at the top right corner of the screen and save it to your gallery.

Note: Only the CapCut mobile application renders the Customized Cutout option.
Method 2: How to Use Green Screen on CapCut with Background Remover?
CapCut’s Background Remover tool automatically eliminates the green screen background with a simple tap. Although, background remover only works for Android devices,
- Open the CapCut and create a new project.
- Add the background photo or video.
- Click on “Add overlay” to Import your green screen video.
- Click on the “Cutout” option.
- Scroll the tool from the bottom and tap on “Remove Background”.
- Click the ‘’Export’’ your video in the top corner.
- Save your video and share it on social media and other platforms.
Pro Tips
We have discussed How to remove the green screen on CapCut with the Chroma key. Unfortunately, the CapCut application doesn’t allow much control regards to Color. But the two options Intensity and Shadow fulfill this lackness and facilitate the removal of the background of different colors from the videos as per user needs.
Intensity
The Intensity feature assists you to remove background color from your clip. Moreover, it enables you to manage and adjust the corners of your subject during background removal. This feature works quite useful in particular textures such as when you need to manage the tons of edges and fibers. Additionally, choosing it too fully may result in other colors appearing dull. So, keep sliding the bar until it delivers your preferred results.
Shadow
Shadow is another incredible feature that plays a critical in removing the green screen background. It provides artificial shadows to the edges of the green screen to give a realistic look by enhancing their outlines without having them look out of place. Shadow also works efficiently reducing background noise or if the video’s lighting doesn’t suit the lighting utilized in the background. Further, use the shadow slider depending on the current screen to maximize or minimize the number of shadows at the edges.
Where to Get Green Screen Videos?
There are the following best and most well-known sites where you can easily find green screen videos:
- Videoblocks
- Adobe Stock
- Pond5
- iStock
- VideoHive
- MotionElements
- Storyblocks
- Pixabay
- FreePik
- Mix kit
- Display
- Clipcanvas
- Motion Array
- VideoBlocks by Storyblocks
- Shutterstock
FAQs
Bottom Line
It was all about how to do a green screen using CapCut application with two different methods. You are free to select any of these two. Whether you’re a filmmaker, video editor, or simply someone searching to add a creative touch to your content, CapCut’s green screen capabilities open up a universe of possibilities. With its intuitive interface and stunning tools, you can showcase your skill and generate captivating visuals that will engage your audience. So, move ahead and dive into the world of green screen editing with this amazing application. Experiment with various backgrounds, animation, and techniques to create amazing videos that stand out from the crowd.


